Custom Client Launcher
This page covers how you can install custom client side mods, resource packs, and shaders for your minecraft client. We'll be using a popular and safe launcher called Prism Launcher.
You do not need to follow this guide to play on this server. This is merely a suggestion and quality of life feature.
Getting Started
Java Installation
Download Amazon Coretto 21 and follow through the installations without changing any default option.
Amazon Coretto 21 Downloads Page
You may need to install a different version depending on what Minecraft Version you're playing.
Amazon Corretto 21 is Java 21 which is required to play Minecraft 1.21 which is our current server version.
Launcher Installation
Prism Launcher is an open-source launcher for Minecraft that provides convenient versions, modpacks, and profile controls, it is a lot easier to use among with mods especially for beginners.
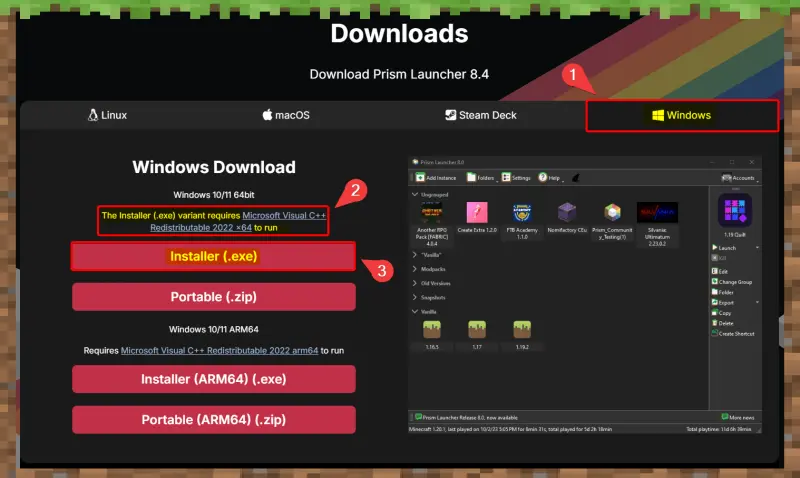
Install Prism Launcher
Click to see visual guide
Account Sign In
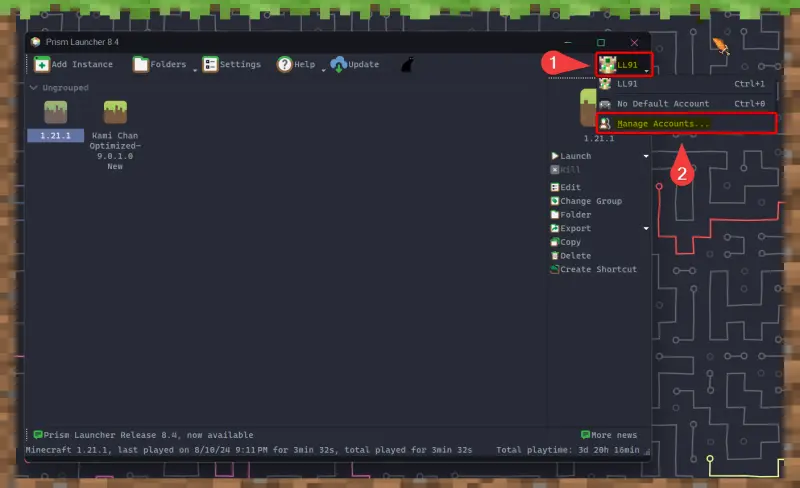
- Launch
Prism Launcherprogram. - Click the drop down menu on the top right of the program that has a Minecraft player's head on it.
- Click
Manage Accounts...from that drop down.
Click to see visual guide
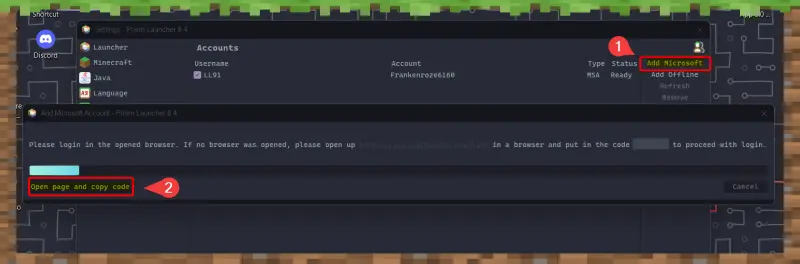
- Click
Add Microsoftlocated on the right side.- Next step only required if a browser does not launch with a webpage.
- Click
Open page and copy codefrom a prompt that should appear. - Follow the rest of the prompt's directions to finish account setup.
Click to see visual guide
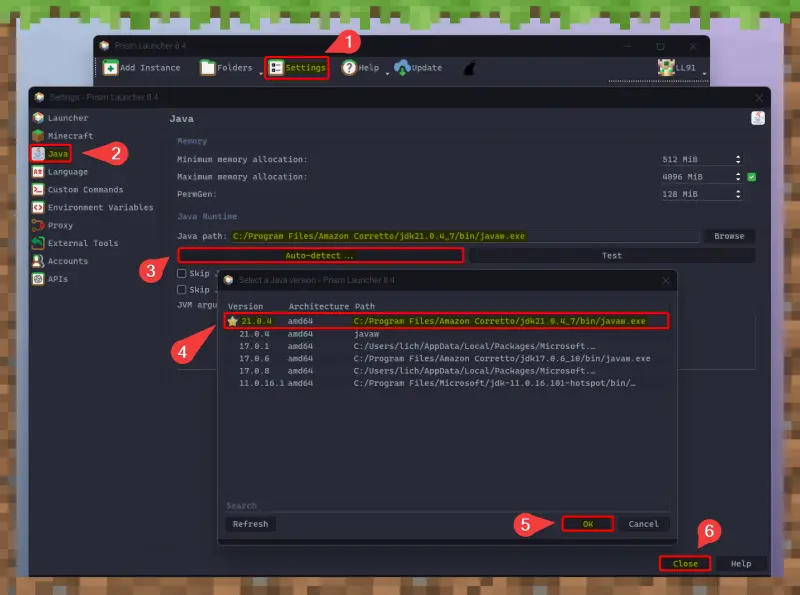
Set Java Version
- Click
Settingslocated at the top menu bar of the program. - Click
Javamenu option located on the left. - Click
Auto-Detect...underJava Path:. - Click on the
Versionwith the path that contains the wordsAmazon Coretto.- If you have multiple javas versions listed make sure its the version you downloaded before.
- Click
OKthenCloseafter confirming theJava Pathis correct.
Click to see visual guide
Modpacks
In the next step, we will be using the two curated modpack options with easy installation directly through the launcher.
Kami Chan Optimized is a modpack with only optimizations mods that are proven to work and with stability in mind.
Kami Chan Optimized Plus is a modpack with many quality of life mods that aim to enhance Vanilla gameplay experience on top of the mods installed above.
We recommend the
Plusversion which includes minimap mod called Xaero's Minimap
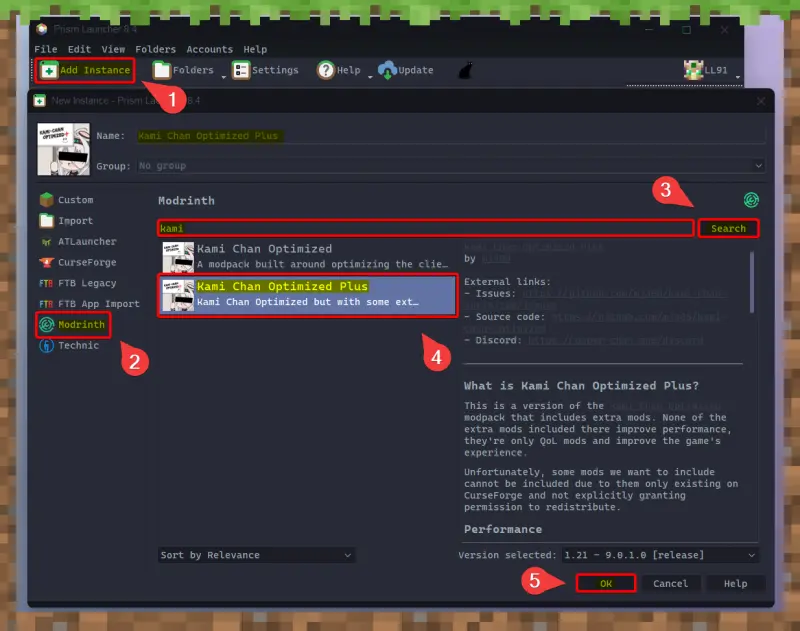
Install Modpacks
- Click
Add Instancelocated at the top menu bar of the program. - Click
Modrinthmenu option located on the left. - Type in the search bar ,located in the middle,
Kamiand ClickSearch. - Click on
Kami Chan Optimized Plusthen ClickOK.
Click to see visual guide
Additional Fabric mods can be found on Modrinth or CursedForge, and sometimes Github. As always, practice proper due diligence and only download mods from trusted source and reputable developers.
Simply right-click the instance > edit > mod tab and drop the mod file onto the folder or use the built in mod site search to find new ones!
Shaders
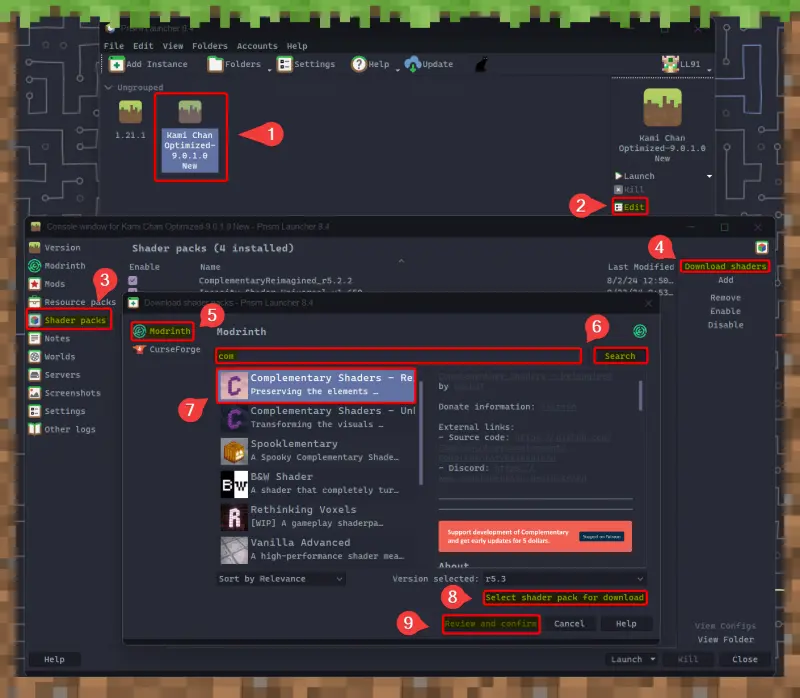
How to Download
- Right Click on your instance
- In this case
Kami Chan Optimized
- In this case
- Click the
Editmenu option - Click
Shader Packsmenu option located on the left. - Click
Download Shadersbutton located on the right. - Click
ModrinthorCurseForge. - Type in a search term and Click
Searchor Scroll through the avalible listing. - Click on a shader pack listing then Click
Select shader pack for downloadlocated near the bottom right. - Click
Review and confirmto finish.
I recommend Complementary Shaders - Reimagined if you want something that is more vanilla like but reimagined!
Click to see visual guide
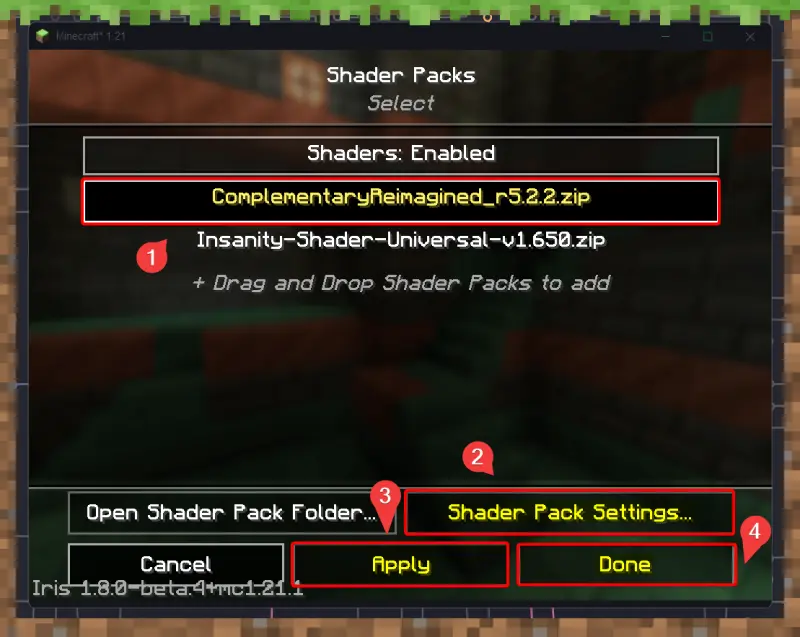
How to Configure
- Double Click your instance to launch Minecraft.
- Click
Options...located near the bottom. - Click
Video SettingsthenShader Packslocated on the top right. - Click on your shader pack of choice and Click
Apply.- Click
Shader Pack Settingsif you want to configure or explore the shader settings.
- Click
- Click
Doneseveral times to return back to the main menu.
Click to see visual guide
Resource packs
How to Download
Follow steps in How To Download Shaders above but with resources as context instead of shaders. Same logic applies.
I recommend Faithful 32x or mullak99's Faithful 32x if you want a enhanced vanilla like re-skin.
Vanilla Tweaks is a build your own resource pack with many little "tweaks" that are fun or useful quality of life changes.
How to Configure
- Double Click your instance to launch Minecraft.
- Click
Options...located near the bottom. - Click
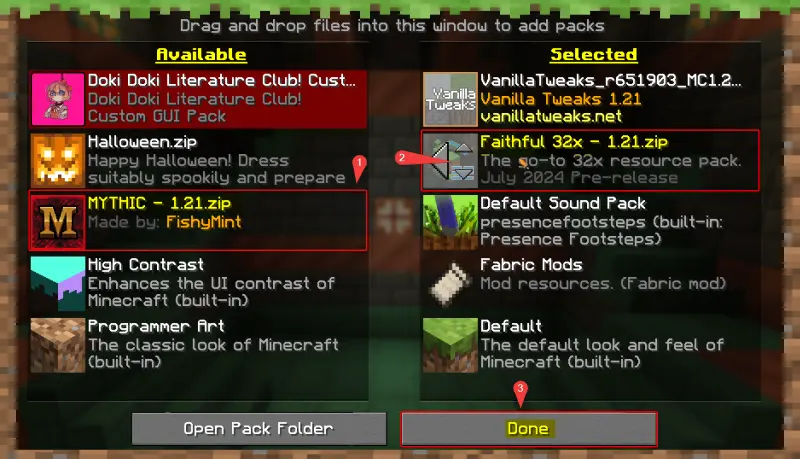
Resource Packs... - Click on a resources pack shown in the
Avaliblecolumn.- This will move them over to the
Selectedcolumn allowing them to be loaded.
- This will move them over to the
- Hover over a mod pack in the
Selectedcolumn.- Click on the 🔼 or 🔽 arrows located on the resource pack's thumbnail to move load order.
- Click
Donetill you're back to the main menu.
Resource packs can contain the same resrouce modfication as another loaded pack.
Changing the load order as mentioned above will allow the higher ordered resource pack to overwrite any conflicting modfication of a lower ordered resource pack.
Click to see visual guide